Quick Testing SOP
Purpose:
Standard quick procedure for hardware quality checks on production devices (Laptop / AIO / PC).
Put this at production monitor on the testing station for tester to follow.
- Ensure TestQC Server is online.
- Connect Ethernet or Wi-Fi (check SSID & password).
- Prepare barcode scanner for serial number scan.
- Confirm good lighting for webcam, mic, and display tests.
- Keep multiple Device Under Test (DUT) ready to speed up workflow.
- Launch TestQC Win.
- Verify device info (component list).
- Connect to network.
- Run all tests in order:
- Keyboard
- Touchpad
- Display (Dead Pixel)
- Touchscreen
- USB Ports
- Microphone
- Speakers
- Video Output
- Webcam
- Battery & Charger
- Bluetooth
- Network
- Sensors (Accelerometer / Orientation)
- Geolocation
- System Information
- Input / Scan Serial Number.
- Submit Report to server.
- Shut down the device.
- Move to next DUT.
| Step | Description | Example |
|---|---|---|
| 1 | Launch App |  |
| 2 | Device Info |  |
| 3 | Testing Menu | 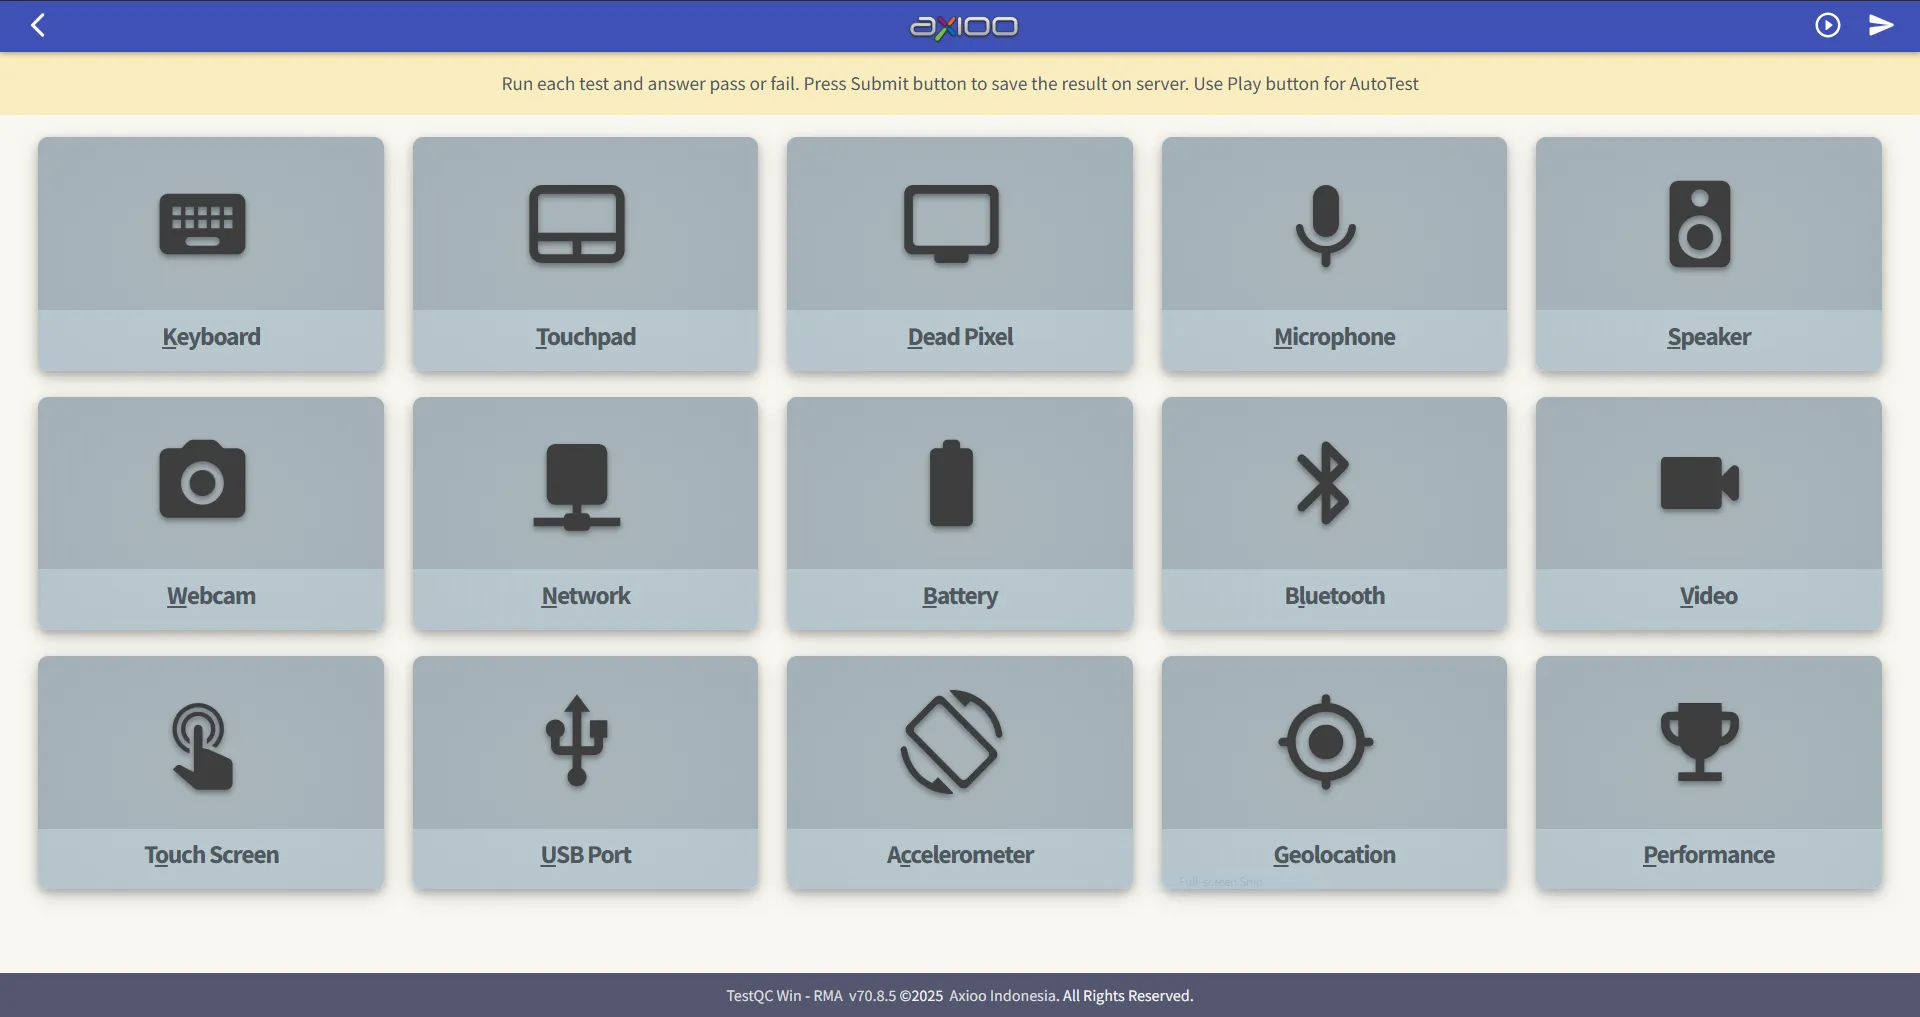 |
| 4 | Keyboard | 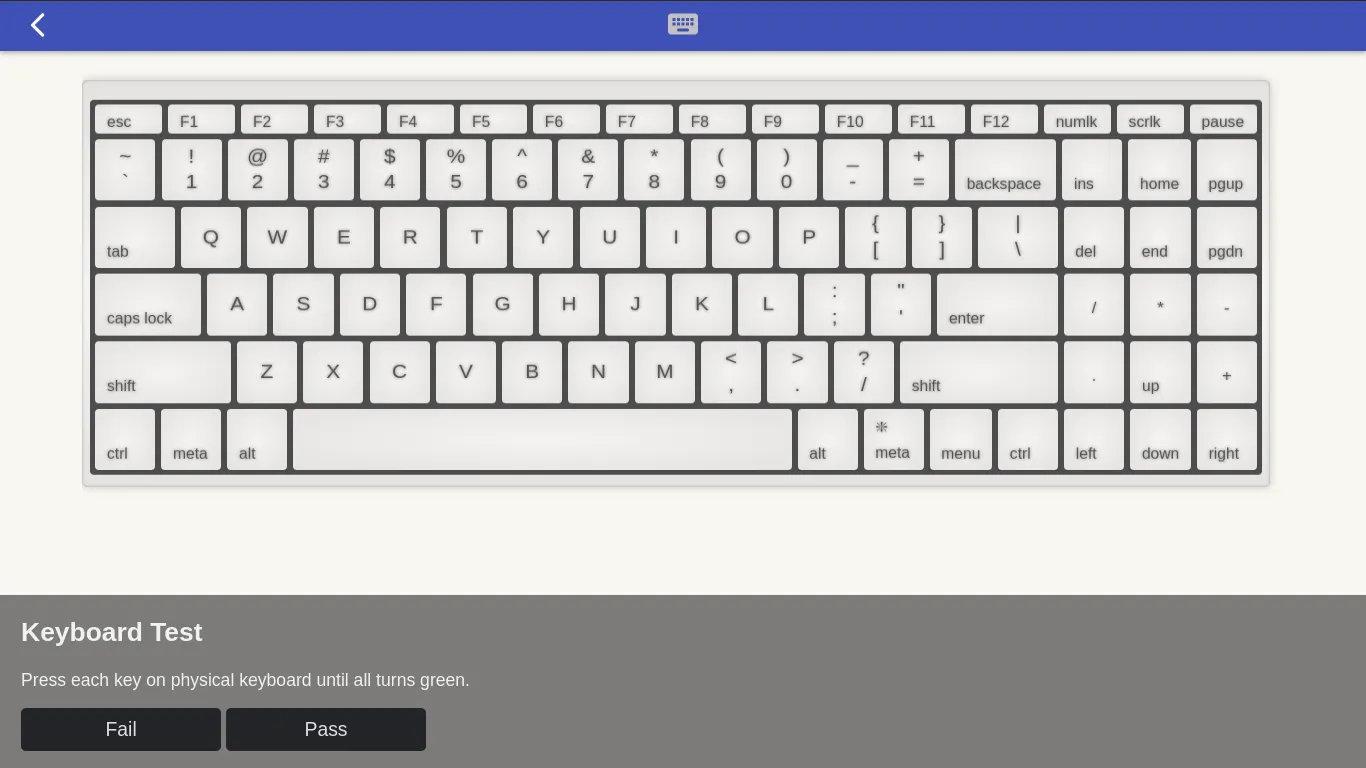 |
| 5 | Display / Dead Pixel | |
| 6 | Touchscreen | 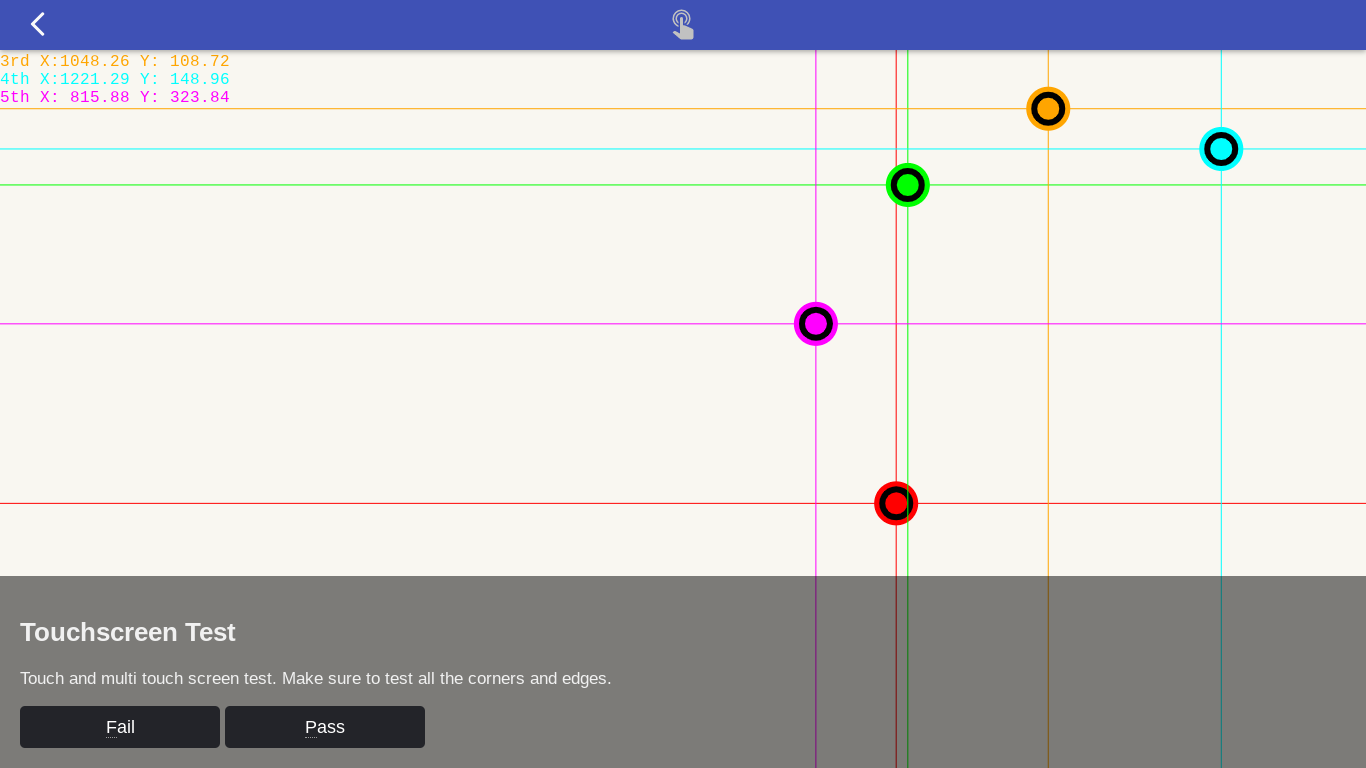 |
| 7 | USB / Ports |  |
| 8 | Audio Tests | 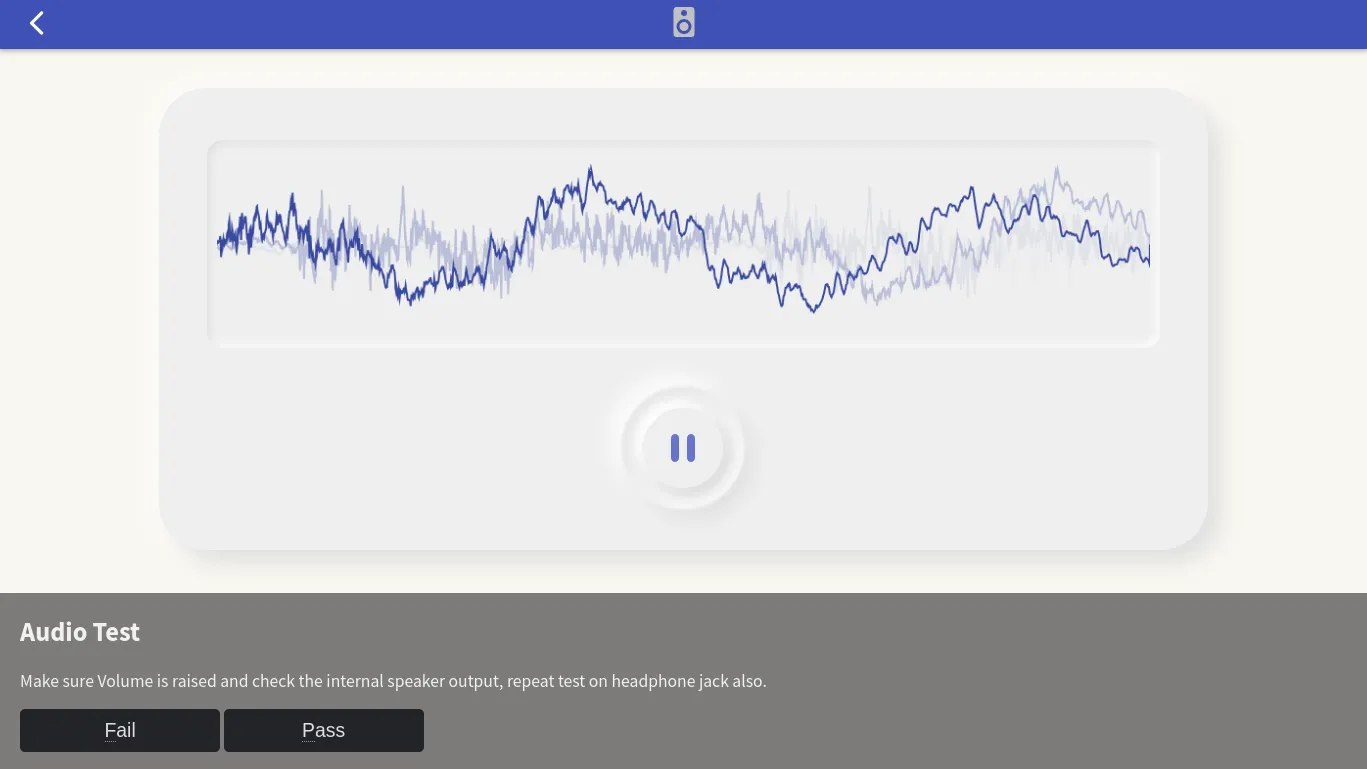 |
| 9 | Camera Test | 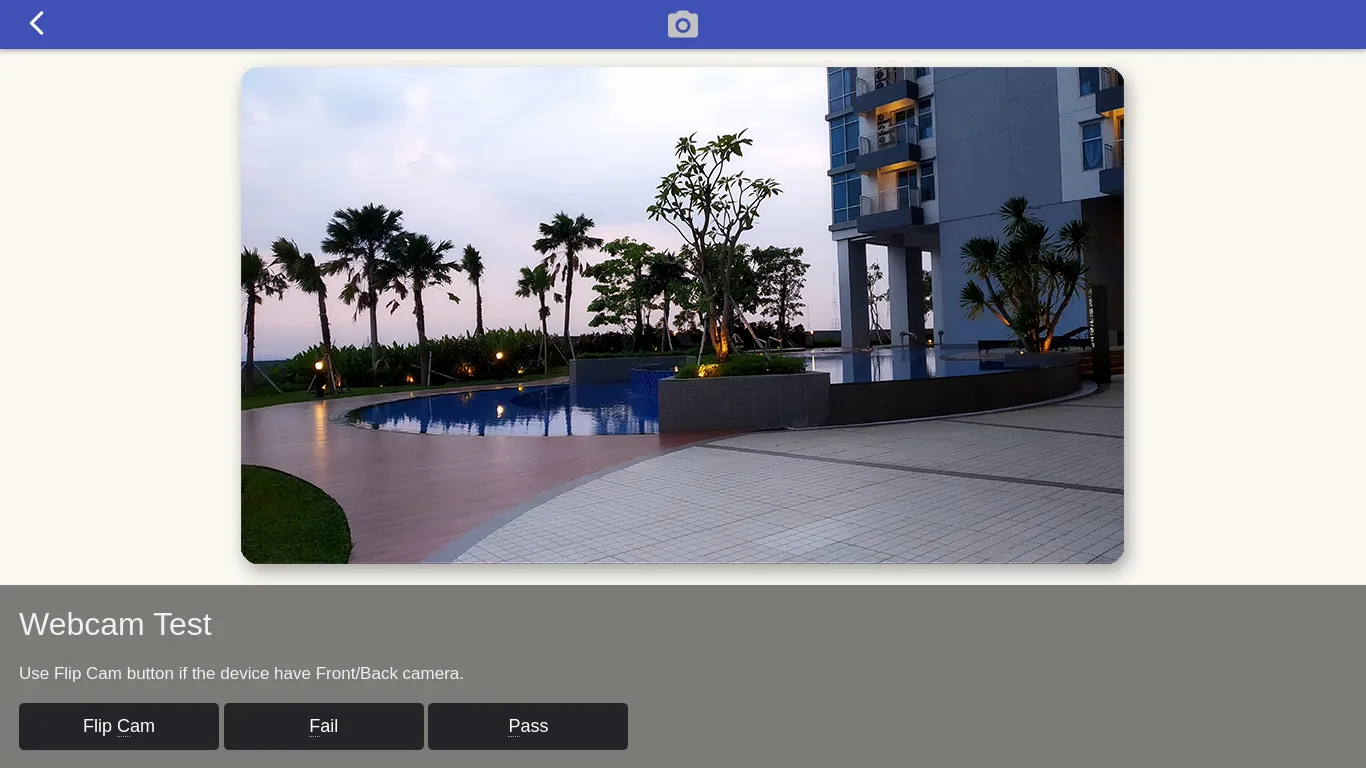 |
| 10 | Submit Report | 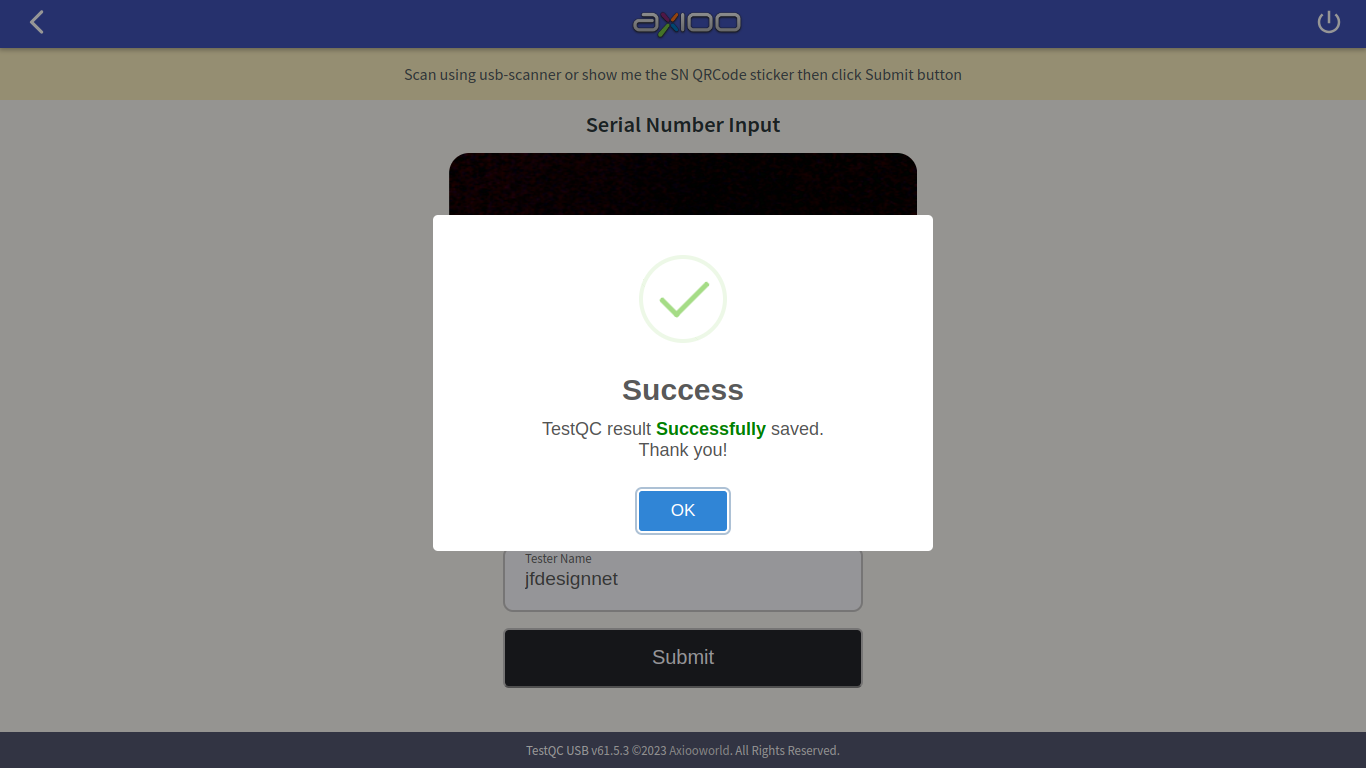 |
- Start tests on multiple units in rotation.
- Use keyboard shortcuts for faster navigation.
- Avoid retesting failed hardware — log and tag it immediately.
- Always upload reports before shutdown to avoid data loss.
All tests are logged to the TestQC server.
Do not modify or skip test steps unless instructed by QC lead.
Keep this procedure visible at all times on the testing station.